I will explore the workspace to locate the text content of the article or files related to "Whitelist the CoreDash Crawler on Your CDN" that need translation. I will search for the phrase "Whitelist the CoreDash Crawler" across the workspace files to see where the source text is located. I will read the script `stateless_translate.py` to understand how the translation fits into the project pipeline. I will search the translation changelog to see past examples of translations (especially Chinese `zh`) to match the style exactly. I will read the `translate_parts.py` file to see if there's any code structure or additional context we should be aware of. I will view the contents of `translated_text.html` to see the style of previous translations in the workspace. I will check `bla.py` to see if there is any other context or logic related to the translation tasks. 在你的 CDN 中将 CoreDash 爬虫加入白名单
I will explore the workspace to locate the file containing the text that needs to be translated. I will search for the source text in the workspace using grep. I will view the `stateless_translate.py` file to understand the workflow of the translation system. I will view the last 100 lines of `translation_changelog.log` to see examples of previous translations and ensure stylistic consistency. 你的 CDN 拦截了我们的性能测试工具。以下是放行方法。

Trusted by market leaders · Client results
将 Core/Dash 爬虫加入白名单
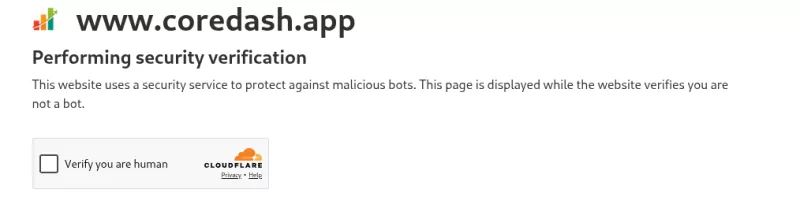
有时,我们的爬虫会被你的 CDN 防火墙拦截。这是由你的 CDN 安全设置决定的。你的网站会显示验证码,而我们的爬虫不会尝试去通过它。
解除对 Core/Dash 爬虫的拦截
Core/Dash 爬虫会向你的服务器表明身份,即 Core/Dash 性能测试工具:
CoreDash/1.0 (+https://www.corewebvitals.io/coredash-performance-tester)
它会在真实浏览器中加载你的页面,并测量 Largest Contentful Paint、Interaction to Next Paint 和 Cumulative Layout Shift。它需要使用真实浏览器,因为只有在页面实际渲染后,这些指标才会存在。
这也是你的 CDN 拦截我们的最常见原因。你的运维团队将 WAF 安全级别设为了“高”,这基本上会拦截所有机器人。你必须告诉你的 CDN,我们是“好的机器人”。
你只需添加一条规则,对 CoreDash/1.0 跳过机器人检查,放行其他所有请求。
基于 User-Agent 允许,而非 IP
匹配 User-Agent,而不是 IP 地址。我们的测试在云端基础设施上运行,因此每次运行的源 IP 都会改变。今天将某个 IP 加入白名单,下周的测试可能就会来自不同的 IP 并再次被拦截。CoreDash/1.0 字符串不会改变,因此匹配它即可。
Cloudflare
Cloudflare 比其他任何 CDN 都更容易拦截我们的测试。你需要哪种规则取决于你的套餐。
在 Pro 或更高版本的套餐中,添加一条动作为 Skip 的 WAF 自定义规则:
- 前往 安全性 > 安全规则 并创建规则。在新版控制面板中,这位于 安全规则 下。
- 清晰命名,例如 Allow Core/Dash。
- 点击 编辑表达式并将表达式修改为
http.user_agent contains "CoreDash/"。 - 将动作设置为 Skip。
- 在 Skip 选项中,勾选 Super Bot Fight Mode。如果拦截测试的是托管规则,也请勾选 All managed rules。
- 部署该规则。

对于免费版套餐,需要注意一点。该版本中的 Bot Fight Mode 并不通过 WAF 运行,因此 Skip 规则无法对其生效,也无法添加例外。如果你使用的是免费版且测试一直触发验证,请在运行测试时,前往 安全性 > Bots 关闭 Bot Fight Mode,测试结束后再重新开启。付费套餐提供 Super Bot Fight Mode,它支持 Skip 规则。
AWS WAF 和 CloudFront
CloudFront 本身并不会拦截爬虫。拦截来自绑定到你分发的 AWS WAF Web ACL。在你的 Bot Control 规则组上方添加一条 Allow 规则:
- 打开与你的 CloudFront 分发相关联 of the Web ACL。
- 添加规则,选择 Rule builder,然后选择 custom rule。
- 在 Inspect(检查)下,选择 Single header 并输入
User-Agent。 - 将匹配类型设置为 Contains string,并将字符串设置为
CoreDash。 - 将动作设置为 Allow。
- 为该规则设置一个比 Bot Control 规则组更低的优先级数字,以便它优先运行。
这里的顺序非常重要。在 AWS WAF 中,Allow 是一个终止性动作。当你的规则匹配时,WAF 会允许请求并停止评估,因此 Bot Control 根本接触不到该请求。如果将该规则放在 Bot Control 下方,在你的 Allow 规则运行之前,拦截就已经发生了。
仍然被拦截?
如果你添加了规则并重新运行测试,但测试依然失败,那么拦截可能来自其他层级:第二个 WAF、安全插件,或者是 .htaccess 或 nginx 中的服务器规则。在这些地方同样查找 CoreDash User-Agent,并以相同的方式予以放行。如果你遇到困难,请联系我们并告知你所使用的防火墙,我们会协助你找到对应的规则。

